| Red Hat Desktop: Deployment Guide | ||
|---|---|---|
| Prev | Chapter 4. Locking Down the Desktop: Disabling GNOME Desktop Features | Next |
4.7. Other Kiosk-related Configuration Tasks
This section documents a number of configuration tasks an administrator might find useful in setting up a machine to serve as a public kiosk.
 | Tip |
|---|---|
Removing the top panel or its Main Menu is recommended for kiosk operation. To remove the top Panel, right-click on it with the mouse and choose "Delete This Panel..." from the Panel menu. |
4.7.1. Preventing Automounting of Drives
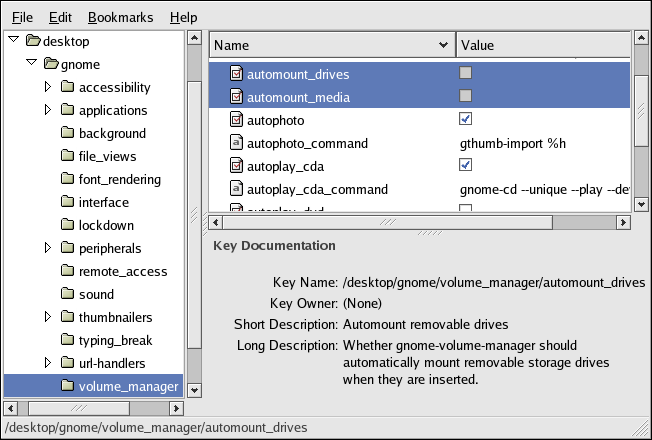
To prevent all drives, such as floppy disks, cdroms, or other removable media from automatically mounting, unset the
/desktop/gnome/volume_manager/automount_drives /desktop/gnome/volume_manager/automount_media |
keys as shown in Figure 4-11.
4.7.2. Disabling Printing Functionality
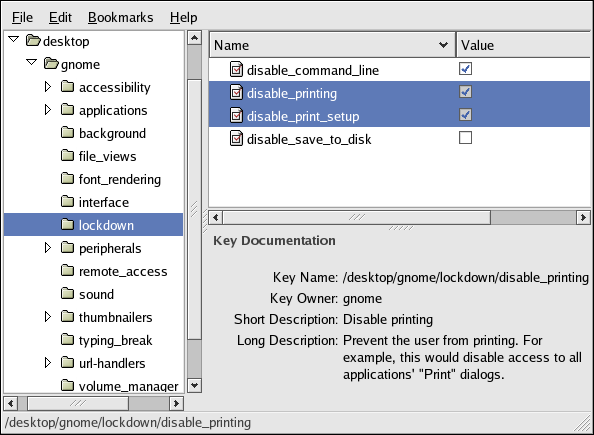
To disable printing and printing setup, set the following keys
/desktop/gnome/lockdown/printing /desktop/gnome/lockdown/print-setup |
as shown in Figure 4-12.
4.7.3. Disabling File Saving
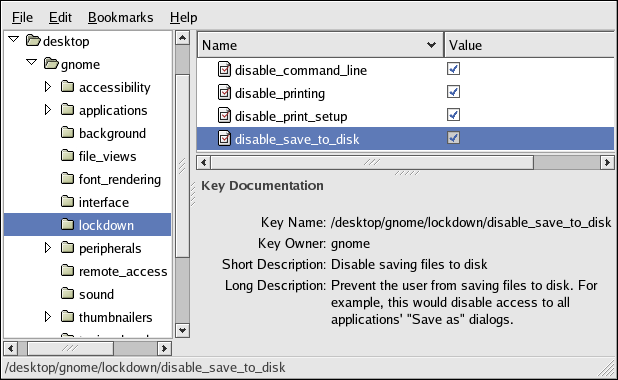
To prevent a user from saving files to disk and from access to all "Save As..." dialogs, set the
/desktop/gnome/lockdown/save_to_disk |
key as shown in Figure 4-13.
4.7.4. Disabling Application Force Quit
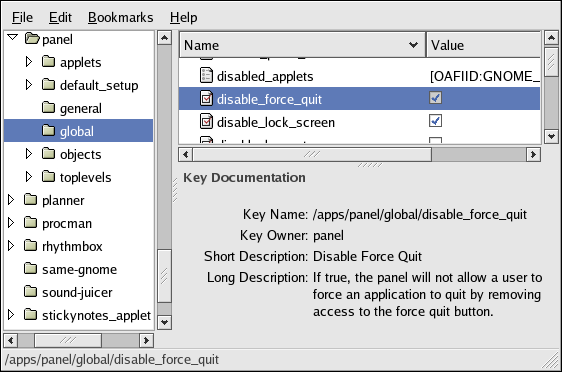
To prevent the user from forcing an application to quit by eliminating access to the force quit button, set the
/apps/panel/global/disable_force_quit |
key as shown in Figure 4-14.
4.7.5. Locking Down Preferences for the Firefox Web Browser
A complete, succinct guide to locking down preferences for the Firefox and Mozilla web browsers is available on the web at http://togami.com/~warren/guides/mozlockdown.
4.7.6. Automatic Login for Public Kiosks
When using a machine as a public kiosk, it is recommended that the system be configured to skip the login screen and to automatically start an X session.
The automatic login process is enabled through the configuration of gdm, the Gnome Display Manager. Specifically, the automatic login functionality is set in the gdm configuration file, /etc/X11/gdm/gdm.conf.
The automatic login process can be enabled by directly editing /etc/X11/gdm/gdm.conf, or by using the graphical Login Screen Setup tool. Both techniques are described below.
 | Note |
|---|---|
Configuring gdm requires administrative privileges. |
 | Tip |
|---|---|
For more detailed information regarding the configuration of gdm, the Gnome Display Manager, refer to the Gnome Display Manager Reference Manual available within the online help system through Applications (the main menu on the panel) => Help, in the Desktop Category. |
4.7.6.1. Using the Login Screen Setup Tool
To enable automatic login using the graphical Login Screen Setup tool, start the application by either
typing the command
gdmsetup
or via the menus through
Applications (the main menu on the panel) => System Settings => Login Screen.
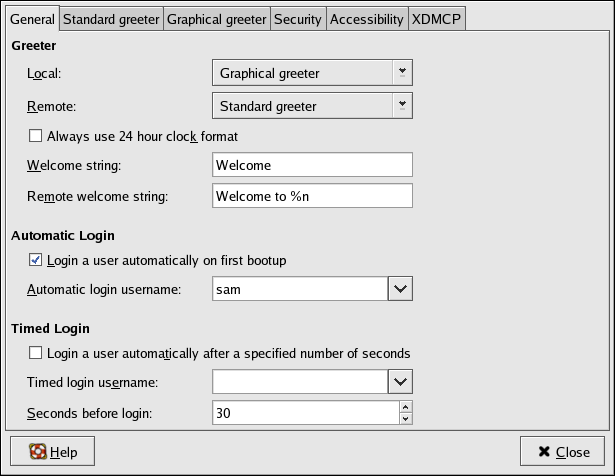
After typing in the administrative password, the Login Screen Setup tool will appear on your screen. To enable automatic login, check the box labelled "Login a user automatically on first bootup" and enter a valid system user name in the Automatic login username text entry box. Figure 4-15 demonstrates this configuration for a fictional user named "sam".
4.7.6.2. Editing the gdm.conf Configuration File
To enable automatic login, add (or change) the following directives to /etc/X11/gdm/gdm.conf:
AutomaticLoginEnable=true AutomaticLogin=<valid_username> |
where <valid_username> is a valid user on the system.
